arduino 学习(1)
arduino 官方网站
https://www.arduino.cc/
arduino 中文社区
https://arduino.me/s/arduino-getting-started?aid=320
- 介绍arduino
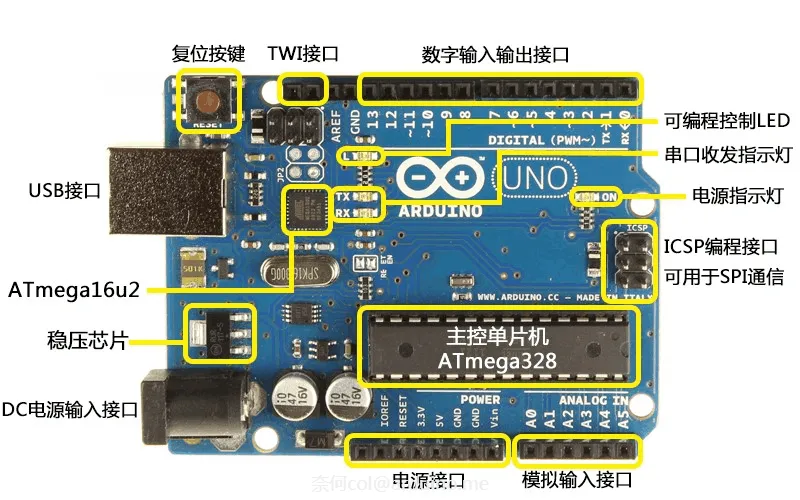
电源(Power):
Arduino UNO有三种供电方式:
1.通过USB接口供电,电压为5V;
2.通过DC电源输入接口供电,电压要求7~12V;
3.通过电源接口处5V或者VIN端口供电,5V端口处供电必须为5V,VIN端口处供电为7~12V;
指示灯(LED):
Arduino UNO带有4个LED指示灯,作用分别如下:
ON:电源指示灯。当Arduino通电时,ON灯会点亮;
TX:串口发送指示灯。当使用USB连接到计算机且Arduino向计算机传输数据时,TX灯会点亮。
RX:串口接收指示灯。当使用USB连接到计算机且Arduino接收到计算机传来的数据时,RX灯会点亮。
L:可编程控制指示灯。该LED通过特殊电路连接到Arduino的13号引脚,当13号引脚为高电平或高阻态时,该LED 会点亮;低电平时,不会点亮。因此可以通过程序或者外部输入信号,控制该LED亮灭。
复位按键(Reset Button):
按下该按键,可以让Arduino重新启动,从头开始运行程序。
存储空间(Memory):
Arduino的存储空间即是其主控芯片所集成的存储空间。也可以通过使用外设芯片的方式,扩展Arduino的存储空间。
Flash:32KB
其中0.5KB分作BOOT区用于储存引导程序,实现串口下载程序的功能,另外的31.5KB是用户可以储存程序的空间。相对于现在动辄几百G的硬盘,可能觉得32KB很小很小,但在单片机上,32KB已经可以存储很大的程序了。
SRAM:2KB
SRAM相当于计算机的内存,在CPU进行运算时,需要在其中开辟一定的存储空间。当Arduino断电或者复位后,其中的数据都会丢失。
EEPROM:1KB
EEPROM全称为电可擦写可编程只读存储器,是一种用户可更改的只读存储器,其特点是Arduino断电或者复位后,其中的数据不会丢失。
输入输出端口(Input/Output Port):
如图 1-20所示,Arduino UNO有14个数字输入输出端口,6个模拟输入端口。其中一些带有特殊功能,这些端口如下:
UART通信:0(RX)、1(TX)
被用于接收和发送串口数据。这两个引脚通过连接到ATmega16u2来与计算机进行串口通信。
外部中断:2、3
可以输入外部中断信号。
PWM输出:3、5、6、9、10、11 可用于输出PWM波。
SPI通信:10(SS)、11(MOSI)、12(MISO)、13(SCK) 可用于SPI通信。
TWI通信:A4(SDA)、A5(SCL)和TWI接口 可用于TWI通信,兼容I²C通信。
AREF:模拟输入参考电压输入端口。
Reset:复位端口。接低电平会使Arduino复位,复位按键按下时,会使该端口接到低电平,从而让Arduino复位。
点灯程序
1
2
3
4
5
6
7
8
9
10
11
12
13
14
15
16
17
18
19
20
21
22
23
24
25
26
27
28
29
30
31
32
33
34
35
36
37
38
/*
Blink
Turns an LED on for one second, then off for one second, repeatedly.
Most Arduinos have an on-board LED you can control. On the UNO, MEGA and ZERO
it is attached to digital pin 13, on MKR1000 on pin 6. LED_BUILTIN is set to
the correct LED pin independent of which board is used.
If you want to know what pin the on-board LED is connected to on your Arduino
model, check the Technical Specs of your board at:
https://www.arduino.cc/en/Main/Products
modified 8 May 2014
by Scott Fitzgerald
modified 2 Sep 2016
by Arturo Guadalupi
modified 8 Sep 2016
by Colby Newman
This example code is in the public domain.
https://www.arduino.cc/en/Tutorial/BuiltInExamples/Blink
*/
// the setup function runs once when you press reset or power the board
void setup() {
// initialize digital pin LED_BUILTIN as an output.
pinMode(LED_BUILTIN, OUTPUT);
}
// the loop function runs over and over again forever
void loop() {
digitalWrite(LED_BUILTIN, HIGH); // turn the LED on (HIGH is the voltage level)
delay(1000); // wait for a second
digitalWrite(LED_BUILTIN, LOW); // turn the LED off by making the voltage LOW
delay(1000); // wait for a second
}里面的宏都是做了2次封装
1
2
3
4
5
6#define LED_BUILTIN 13
#define HIGH 0x1
#define LOW 0x0
#define INPUT 0x0
#define OUTPUT 0x1其他配件
- 面包板
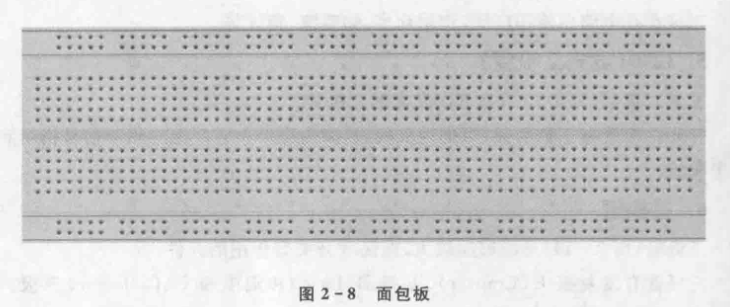
面包板,对于两边的插孔,是横向联通。
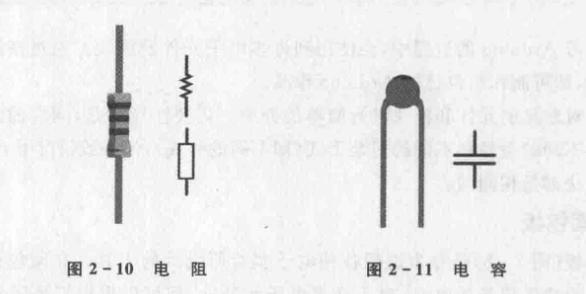
对于中间的插孔,是纵向联通。 - 电阻和电容
- 二极管/LED(发光二极管)/三极管
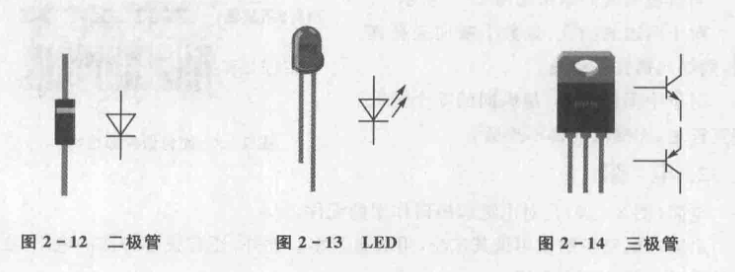
二极管:单向传导电流。
LED(发光二极管):正负两极,短脚为负,长脚为正。
三极管:放大、震荡和开关作用。有发射极E(Emitter)、基极B(Base)和集电极C(Collector)三极。有PNP和NPN两种类型的三极管。 - 传感器扩展板
- 面包板
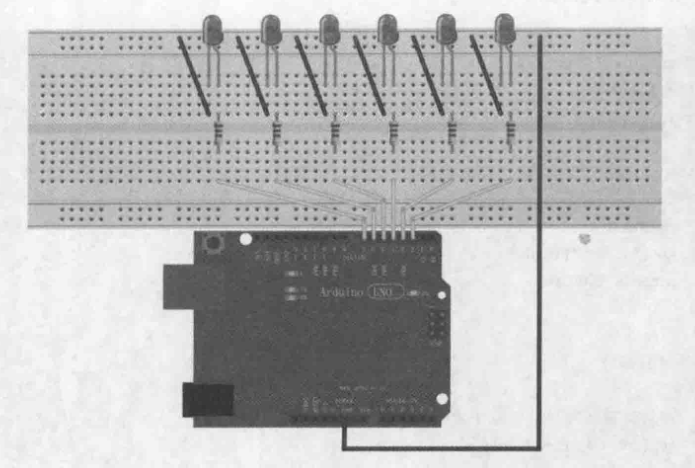
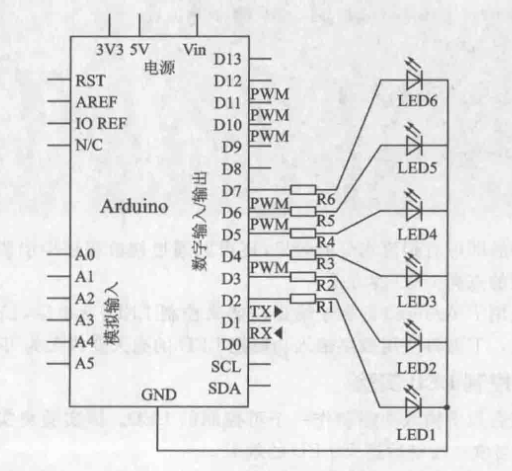
流水灯实验
1
2
3
4
5
6
7
8
9
10
11
12
13
14
15
16
17
18
19
20
void setup() {
// initialize digital pin LED_BUILTIN as an output.
for(int i = 2; i < 8; i++)
pinMode(i, OUTPUT);
}
// the loop function runs over and over again forever
void loop() {
for(int i = 2; i < 6; i++) {
digitalWrite(i, HIGH); // turn the LED on (HIGH is the voltage level)
delay(500); // wait for a second
digitalWrite(i, LOW); // turn the LED off by making the voltage LOW
}
for(int i = 6; i > 2; i--) {
digitalWrite(i, HIGH); // turn the LED on (HIGH is the voltage level)
delay(500); // wait for a second
digitalWrite(i, LOW); // turn the LED off by making the voltage LOW
}
}
呼吸灯
通过电位器控制呼吸灯频率
1
2
3
4
5
6
7
8
9
10
11
12
13
14
15
16
17
18
19
20
int ledPin = 9;
int pot = A0;
void setup() {
}
// the loop function runs over and over again forever
void loop() {
for(int fadeValue = 0; fadeValue <= 255; fadeValue +=5) {
analogWrite(ledPin, fadeValue);
int time = analogRead(pot) / 5;
delay(time);
}
for(int fadeValue = 255; fadeValue >= 0; fadeValue -=5) {
analogWrite(ledPin, fadeValue);
delay(analogRead(pot) / 5);
}
}光敏电阻
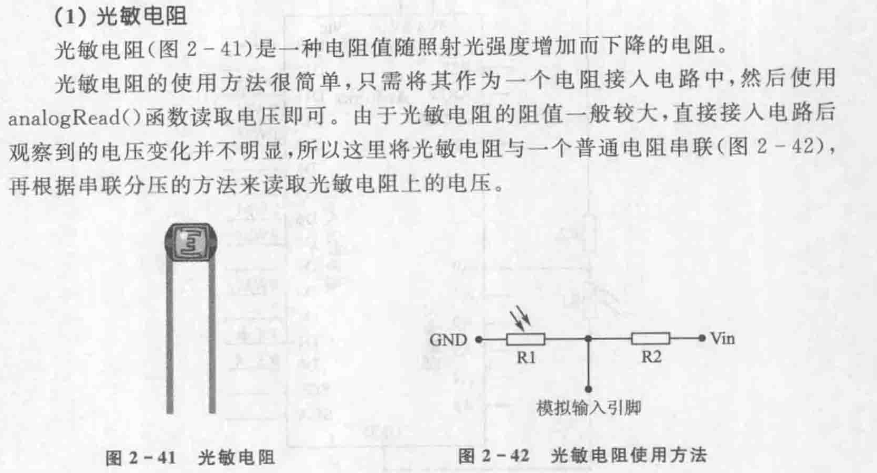
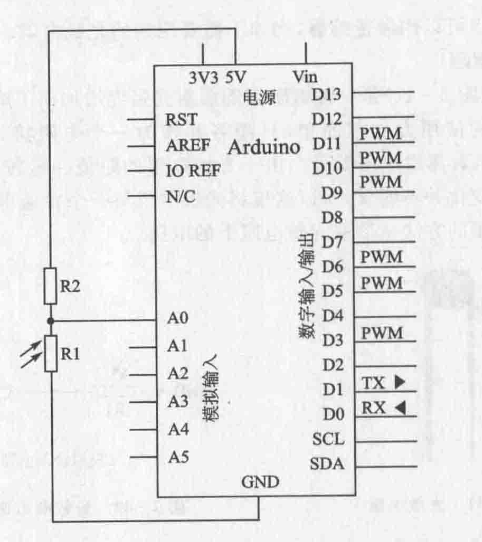
读出电压 x = R1 / (R1 + R2) X 5V
0.5 = R1 / (R1 + 10000) X 5
R1 = 101
1 = R1 / (R1 + 10000)X 5
R1 = 2500
- 温度传感器


1
2
3
4
float temp = (5.0 * analogRead(LM35) * 100.0) / 1024;
Serial.print("temperature: ");
Serial.print(temp);
Serial.println(" C"); - 其他模块
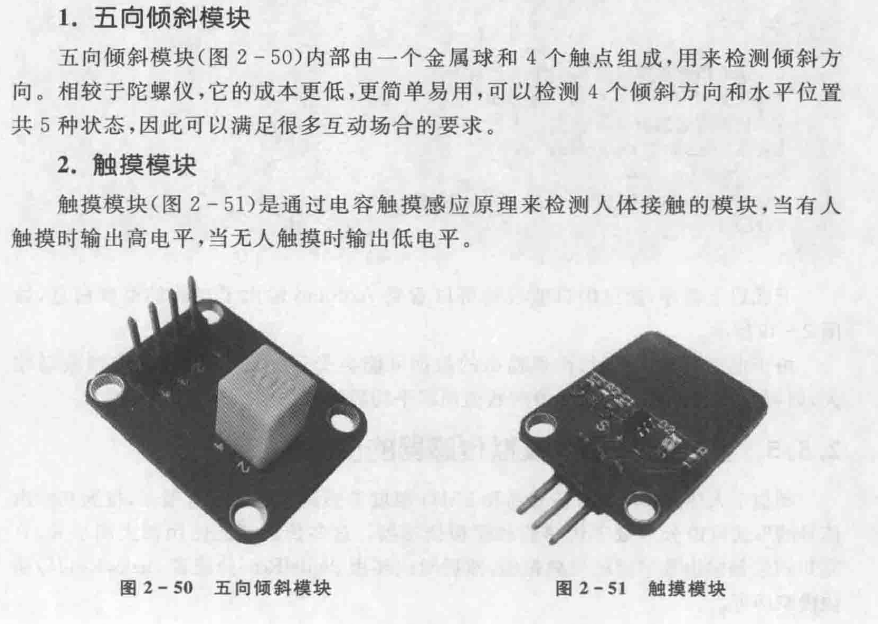
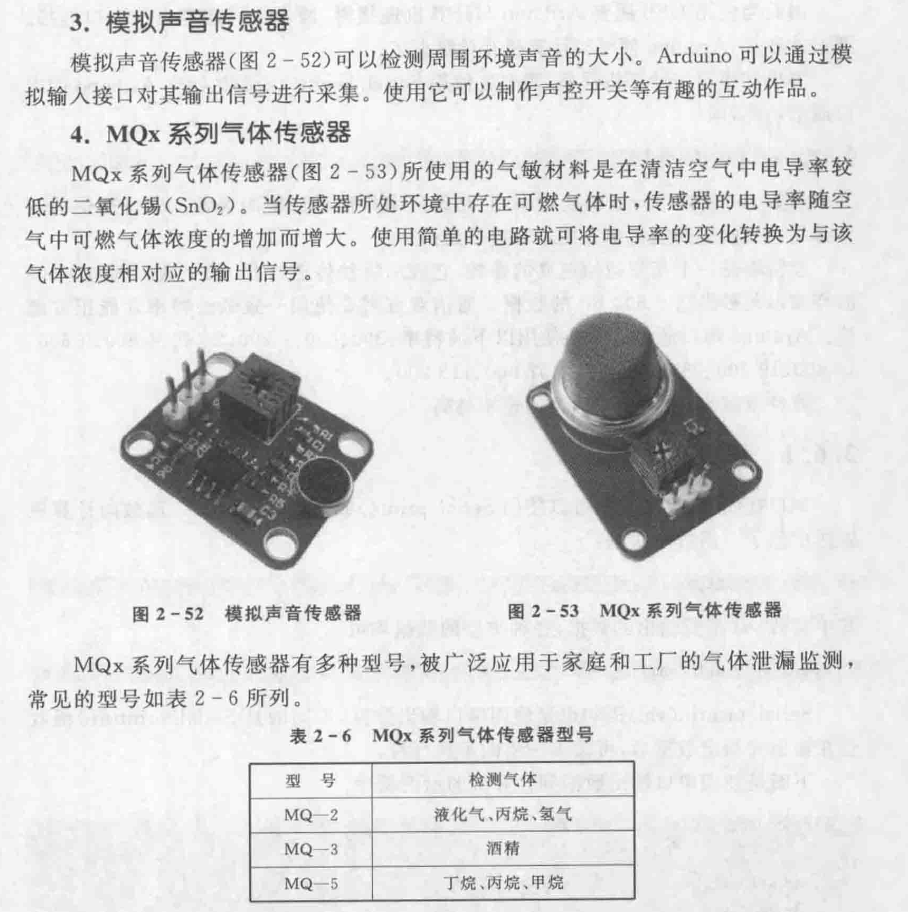
- 串口
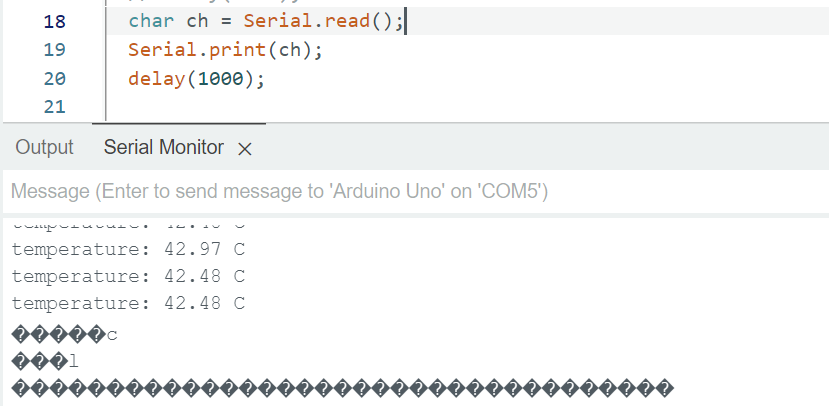
无输入字符便会返回-1,对应乱码。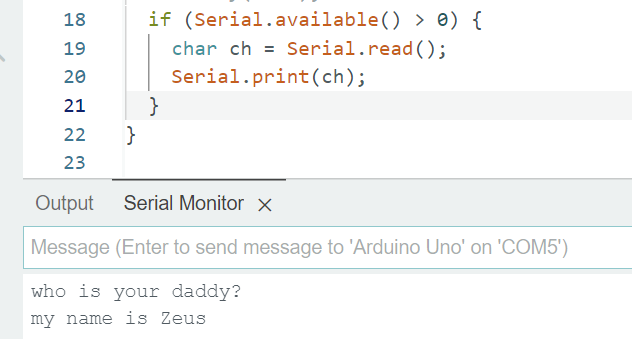
可使用available判断。
通过串口输入来控制灯的亮灭。
1 | |
- 运行时间函数延迟函数
1
2
3
4
5
6
7
8
9
10
11
12
13
14
15
16
17
18
19
20
21
unsigned long time1;
unsigned long time2;
void setup() {
// put your setup code here, to run once:
Serial.begin(9600);
}
void loop() {
// 根据Arduino晶振不同,16MHz精度为4微秒,8MHz精度8微秒
time1 = millis(); // 返回毫秒,大概50天溢出一次
time2 = micros(); // 返回微秒,大概70分钟溢出一次
Serial.print(time1);
Serial.println("ms");
Serial.print(time2);
Serial.println("us");
delay(1000);
}1
2delay(); // 毫秒级延迟,unsigned long
delayMicroseconds(); // 微秒级延迟, unsigned int
tips:
- 扩展板(Shield)